I wanted to be able to see connections from the photos I produce to that of the photographers/artists I have researched.
I want my photos to have that sense of tension and awkwardness and yet that airiness of a dream like situation. A pause in time - still life. However, I wanted that uniqueness to influence my ideas by Tim Walkers and John Rees' work and so I have decided to make the models in my photos into mannequins in order to get that pause in time across to my viewers. I thought of mannequins because they are still and most of them, when you look into their faces, have an awkward face or expression as thought they haven't got their pout right or their hair right or even their pose right.
Here are the photographs in which came out of this experiment:
When I started this experiment I didn't think that I would be able to complete it as I thought that I had set myself to much as there wasn't really any evidence or any photographs that could link really well with this task as no one had any evidence of what it would look like if time stopped so I was quite nervous about doing this task.
One of my major problems was to actually be able to have the hair and clothes in the air at the point of the camera flash as she would have had to have been moving quite fast for her hair to be directly in the air. However I found a way in which I could have this effect without actually having the model blurred.
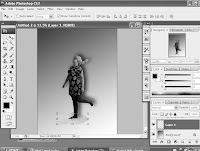
Here are the screenshots of the process of one of the photographs above to make you understand what I done to get these photographs:
The first thing I done was opened up photoshop. From this I then opened my photograph, File > open > (my photo), and selected around the model using the 'quick selection tool'.
Now I opened a new page > file > New > International paper > A4
I now added a gradient to the page using the 'gradient tool' of which there were a selection of colours to choose from but I chose a warm grey as I didn't want the background to distract away from the model. Once selected, I then had to draw a line with the 'gradient tool' from the left top corner to the middle, bottom of the page. This then set the gradient accordingly.
This was my finished result.
I then went back to my photograph. Using the 'move tool' I dragged the model from my photo to the new page.
As my model still had some of the background of my photograph within the selection I used the 'eraser tool' to rub away any of the background visable. This then left me with my model as a rough cutting so I used the 'blur tool' > opacity 23%, to lightly go around my model and make her look more 'within' the backgound.
After I had blurred the rough edges, I then decided to add a 'drop shadow' so I selected the layer I wanted the drop shadow to be present and then > Layer > Layer style > drop shadow. This then lead me to this window, above left, from here I had to decide what angle I wanted the shadow to come away from the body, what distance from the body, what spread and what size. Distance 87 > spread 9 > size 68. This image, above right, is how the shadow came out.
I then repeated my first steps, File > open > my photo. This time I opened up my photo of a blu tack blob. The image was placed directly into another layer of which I placed behind my layer with my model on. I then adjusted the 'brightness and contrast' to match that of my model.
As my model's foot didn't have a shadow on the blue tack I decided to make my own. I selected the 'eyedropper tool' and clicked on the area just below my models foot. I then clicked on the 'colours' window and made the colour about 50% darker than it was. I then painted on the colour just under my model foot using the 'brush tool'.
This is the shadow of which was created.
I then cropped the picture to a decent size using the 'rectangular marquee tool' > image > Crop.
This was my final outcome. (above)


No comments:
Post a Comment